Setting up new WAF
Follow these steps to configure AngkasaIO WAF for your web application and enhance security:
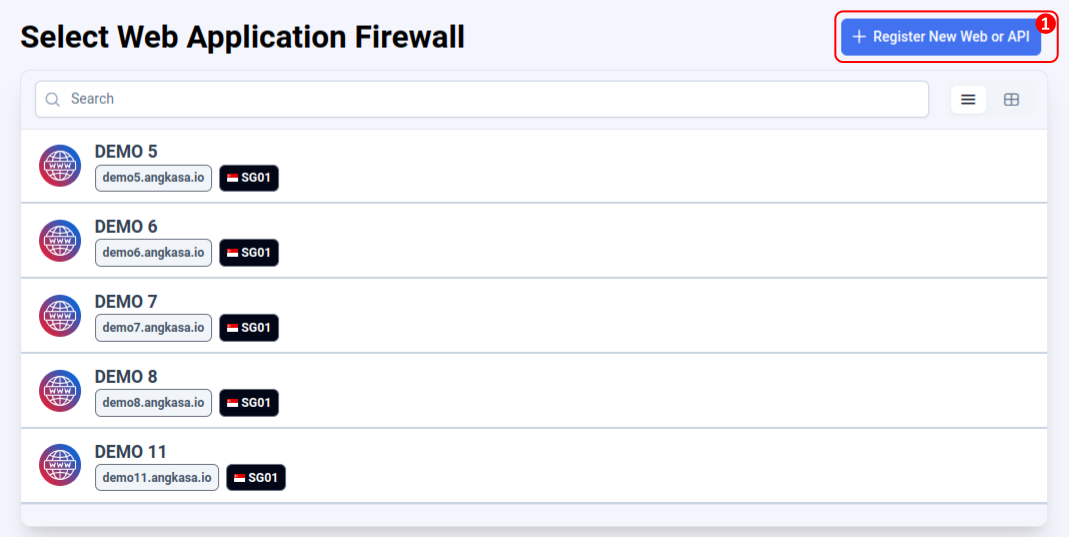
Registering new Web Application
- Browse to your AngkasaIO Space (your dedicated environment).
- Navigate to the WAF configuration panel and click Register New Web or API to access New Web Application Registration form.
- New Web Application Registration form will show. Enter the required details:
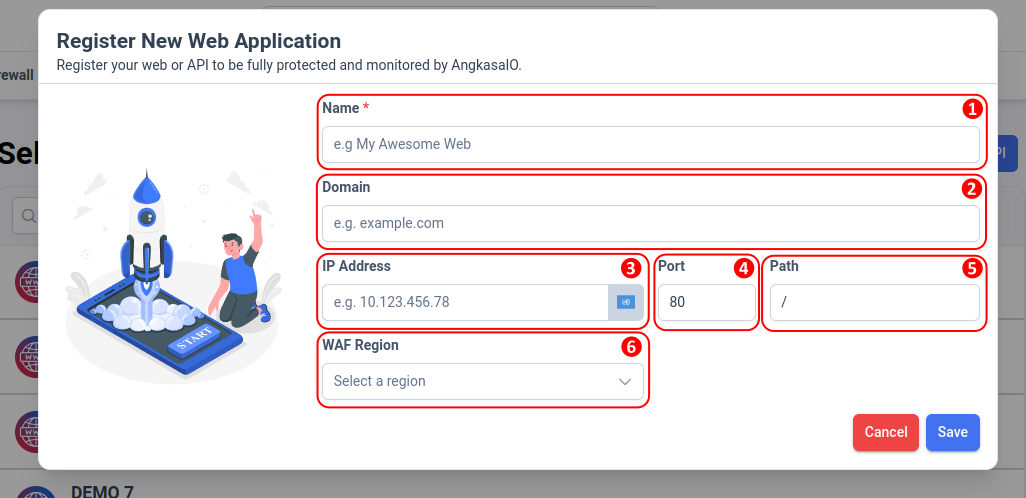
- Name: Assign a meaningful name to your AngkasaIO WAF instance for easy identification1.
- Domain: Enter your valid domain name (e.g.,
example.com). This will serve as the address of your application2. - IP Address: Input the public IP address of your Origin Server where your application is hosted3.
- Port: Specify the port number your application is running on (e.g.,
80for HTTP,443for HTTPS)4. - Path: Define the root path or specific directory of your application (e.g.,
/or/app)5. - WAF Region: Choose your desired AngkasaIO WAF region. You may choose cluster with same or nearest region to your Origin Server location6.
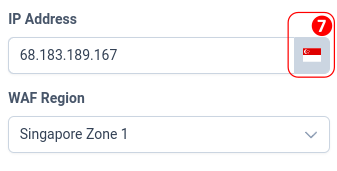
Help: IP Geo Location Detection
To help you choose the best AngkasaIO WAF Region, the system automatically detects your Origin Server's location once you enter your Origin Server IP address 3. This ensures optimal performance and lower latency by recommending the nearest or most suitable AngkasaIO WAF cluster for your application7.
- Click the Save button to submit your form.
- The system will process your registration and automatically redirect you to the AngkasaIO WAF Configuration page.
- Next you must cnfigure your Application DNS and complete the DNS Verification and c to activate the AngkasaIO WAF services. 🚀
DNS Configuration
Before you continue
If you're not familiar with this topic, please start by reading the AngkasaIO WAF DNS Records Overview document. This will help you understand how DNS records work and how they are configured for AngkasaIO WAF to ensure proper routing and security for your application.
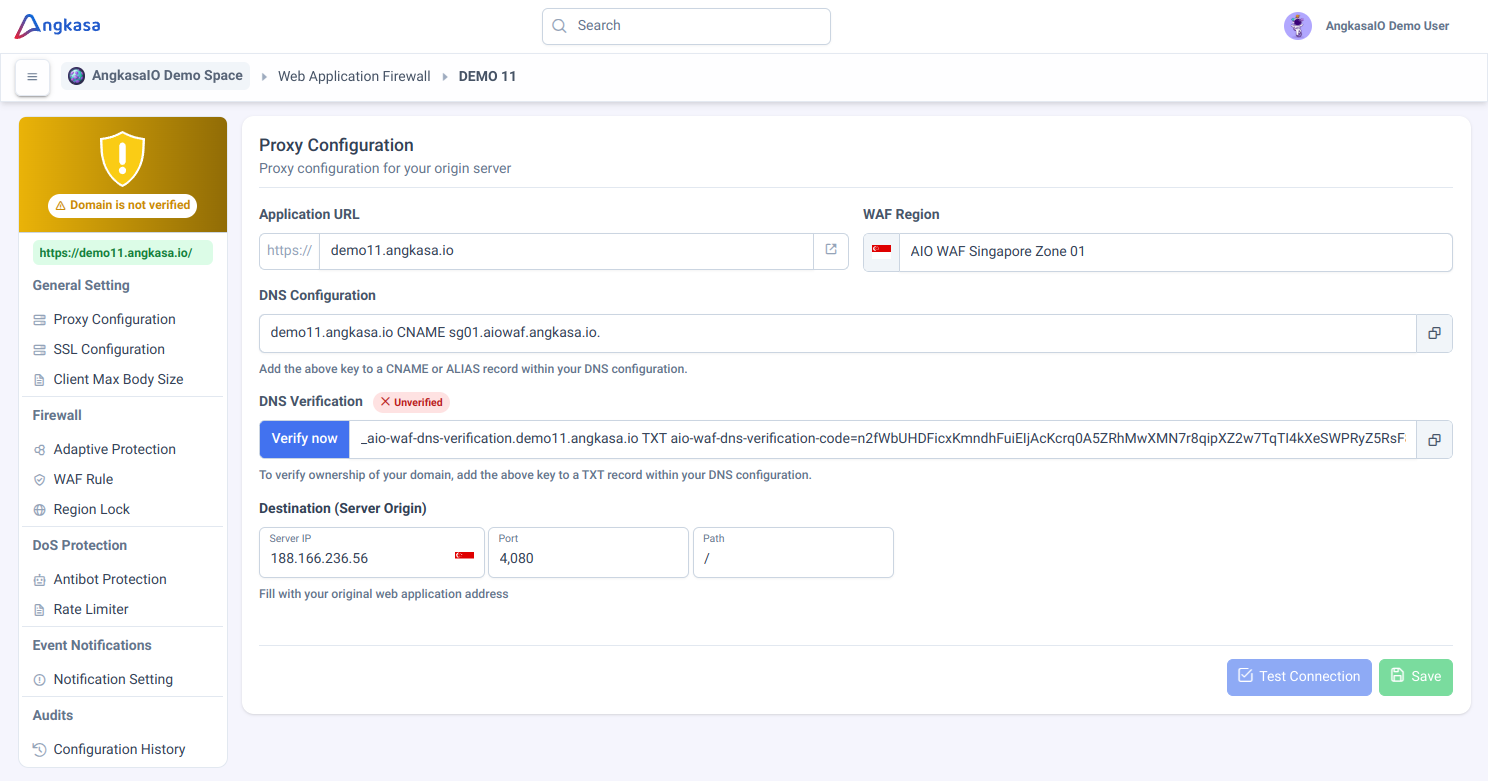
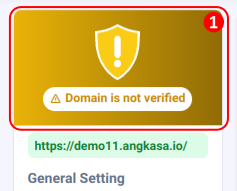
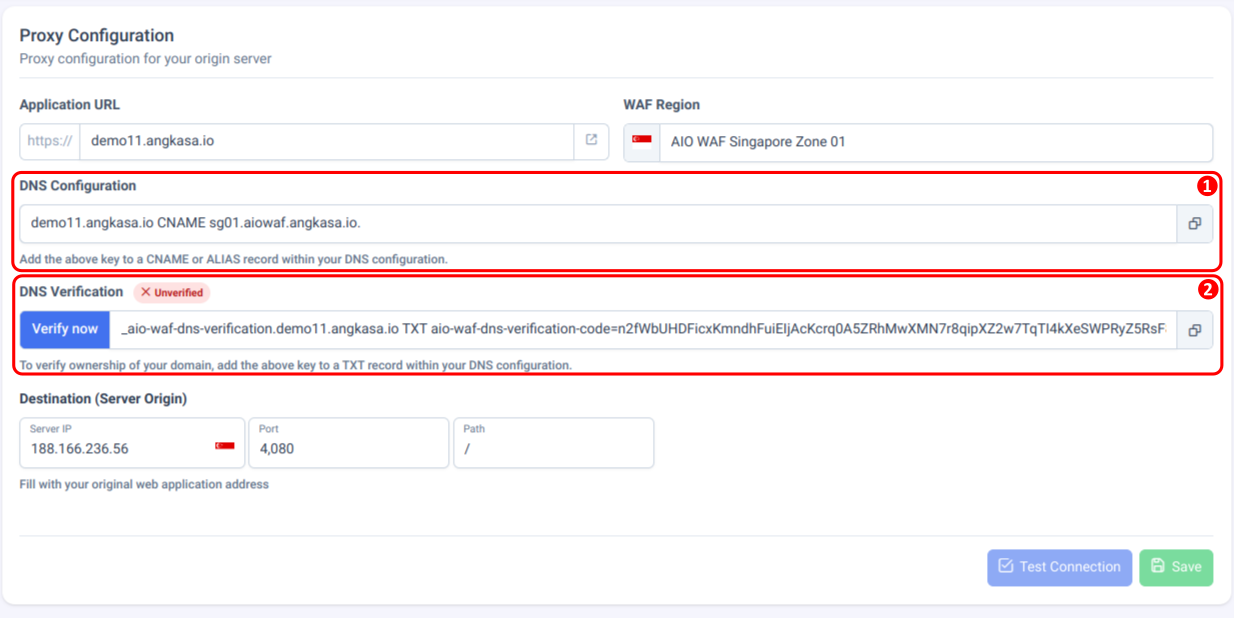
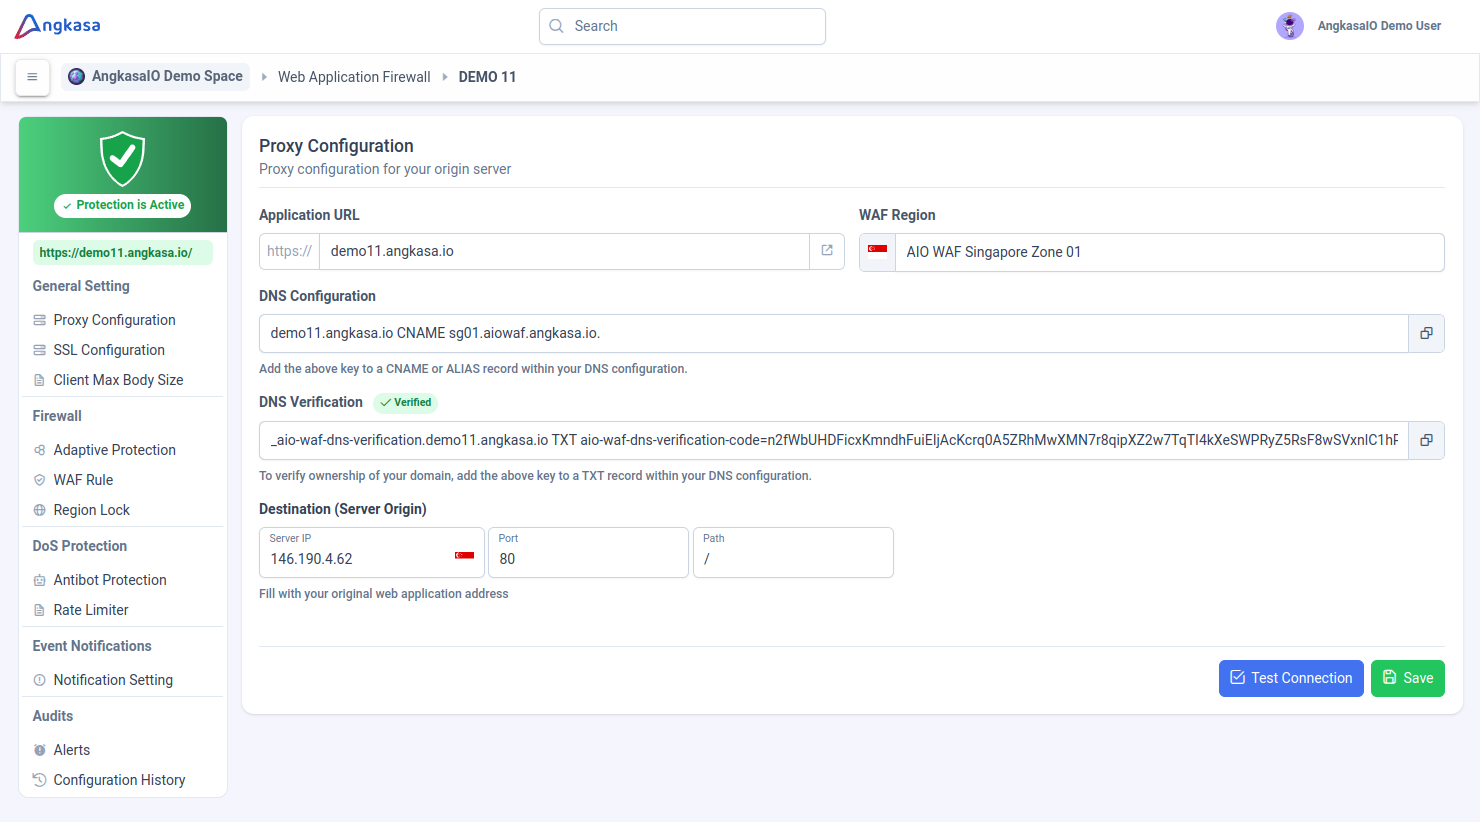
In WAF Configuration Page, locate and navigate to the Proxy Configuration section under General Setting. This section contains detail of your DNS configuration.
As you can see that your WAF is not active yet due your DNS is not verified 1.
To verify your domain, you need to enter the following DNS configuration to your Domain DNS Manager
- DNS Configuration: A DNS
CNAMErecord pointing your domain to the AngkasaIO WAF1. - DNS Verification: A
TXTrecord to verify your domain’s ownership2.
- DNS Configuration: A DNS
Copy the DNS Configuration and DNS Verification value and enter to your Domain DNS Manager. This is reference about step-by-step instructions for configuring DNS records on some of the most popular hosting services.
After this, you can continue to DNS Verification section to verify your domain and start using AngkasaIO WAF.
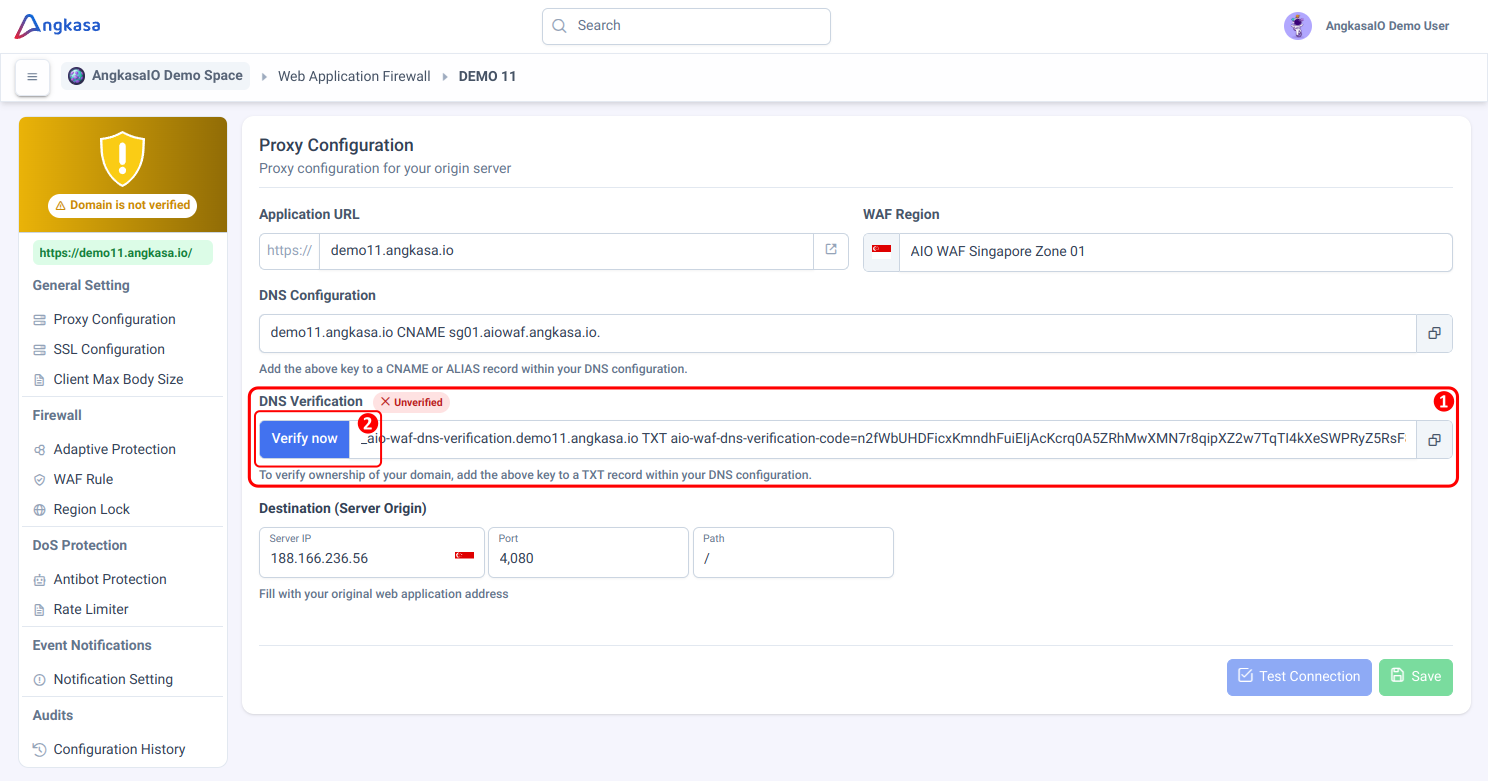
DNS Verification
In the Proxy Configuration section under General Setting of WAF Configuration. Locate the DNS Verification section 1 and click Verify now button to verify your DNS 2.
If everything is correct you will get notification that your Domain verification is success.
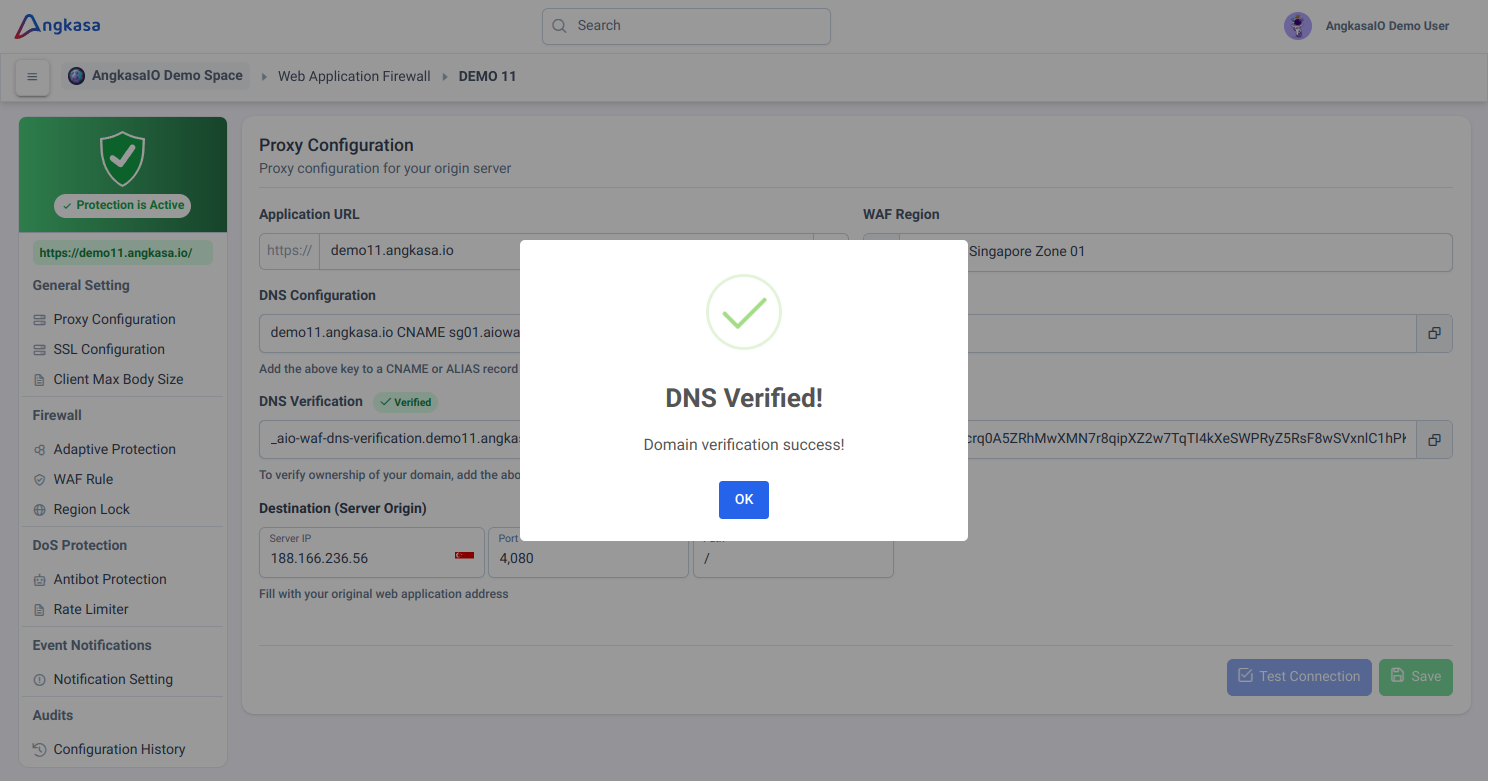
Now your AngkasaIO WAF is active and you can continue to AngkasaIO WAF Configuration to config your AngkasaIO WAF behavior.
Let's exploring the Angkasa! 🚀